
There are a few types of chocolate filling – ganache (butter and cream based), sugar based fillings, nut based fillings, etc. Below is a recipe for butter ganache… which has the best texture in my opinion, and keeps really well. Use good butter. It is also key to use liquid sweetener, as the sweetener doesn’t get heated as it does with cream based ganache, so it will stay gritty.
1.0 Chocolate Butter Ganache Recipe
Ingredients:
- 200 grams ________________Dark Chocolate (~7 oz) (DO NOT USE chocolate chips)
- 115 grams ________________ Butter (high fat European style butter, ~4oz) at room temperature
- 30 grams ________________ Honey (~1 oz) – you can use corn syrup if you want.
- 60 grams ________________ Liquor for flavoring (like cognac, bourbon, etc) – you can also leave this out, and get a slightly firmer chocolate, that just tastes like awesome chocolate
minimum 150 grams ________________ Dark Chocolate for coating
Special Equipment:
- Heating Pad (seriously worth it – it keeps the chocolate at the working temperature)
- If you refuse to get a heating pad, keep the water in the double-boiler going at a low simmer.
- Heat gun (handy but not required)
- Polycarbonate chocolate moulds (handy, not required)
- 2 or 3 sheet pans with parchment
- Metal bowls
- Glass bowl (handy, not required)
-
-
- Good for ganache
-
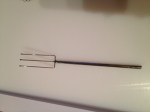
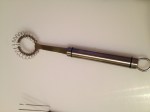
- chocolate dipping fork – my preferred one.
-
- Board scraper, and flat spatula
-
Instructions:
- Melt 90% of the chocolate. The recipe above lists chocolate for the filling,and coating separately – but I melt them together then weigh out the 200 grams of the filling. Using tempered chocolate in your fillings will make the texture nicer, and extend the shelf life, it also makes it easier to work with.
- Back to melting chocolate. There are several options here, if you have a warming drawer, melt it in a metal container on the lowest setting – it takes a while, but is hands off and consistent.
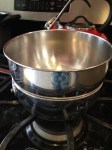
- To melt in a double boiler, find a saucepan and bowl that fit nicely together, and fill the pan with ~1inch of water. Set to boil, then add the chocolate, and stir, lowering the heat to prevent scorching. When you remove the bowl, do it quickly and wipe away the water vapor.
- Now that the chocolate is melted, it should be around 120°F or a bit higher, melting the crystals that make chocolate solid.
- Start stirring the chocolate and scooping it up in the air and letting it fall back down to cool and agitate (without folding in air). Get the temp. down to ~112°F once there, start adding a little bit of the tempered reserved chocolate, stir it in. Keep adding little bits of tempered chocolate as you stir to cool.
- Once the temperature gets down to ~90°F stop adding tempered chocolate, and stir a little less.
-
Allow the chocolate to cool all the way to 85°F (for dark chocolate, 83°F for milk, 81°F for white and cocoa butter)
- Once cooled to 85°F (or a bit before then) – dip a very clean butter knife into the chocolate, and set aside. It should start to harden at room temperature, within a few minutes. If it doesn’t, stir a bit more, and give it some time at 85°F – like 5 minutes at least.
- At this temperature/stage the chocolate has many different kinds of crystals happening. (see below of more on chocolate crystals)
- There is only one kind you really want – so, we need to raise the heat carefully to 90°F – which is called the working temperature. This melts some of the more fragile crystals that happen at lower temps.
- At this point, heat up the heating pad, and the glass bowl – use the heating pad to warm up the chocolate (metal bowl will transfer heat faster), then pour the chocolate into the glass bowl (glass holds temperatures better than metal).
- Test the chocolate again, on another clean knife. It should set with a nice shiny finish, no dots or streaks (those are the wrong kind of crystal, your temp. may be too low still, if it forms quickly) – if it takes forever to set, lower the temperature again while stirring. Test again, then bring back to 90°F.
- Use the metal bowl from before to measure out your 200 grams of chocolate.
- Set that aside, and in another bowl whisk together the soft butter, and honey.
- Whisk in the chocolate, till all the butter is combined. Slowly add in the liquor if you’re using any.
- [If you were wanting to make a ganache with cream, you should bring the cream (133 grams per 200 grams dark chocolate) to just a boil, and add it to the chocolate – whisking to combine – also cut the butter down to a tablespoon or two]
- To make the ganache extra smooth, you could pulse it in a food processor few times with the blade attachment.
Your ganache is ready – it should already be coming together and starting to set. Put the bowl near the heating pad (which your remaining tempered chocolate should be hanging out on, at 90°F)
If you’re going to hand dip:
- Get a piping bag ready with a large plain tip (or cut the edge of a plastic bag), and fill it with ganache.
- Pipe balls of ganache onto a parchment covered sheet pan.
- Chill, then roll the balls.
- Then re chill. Don’t leave in the fridge too long though.
- To dip chocolate like a pro, take some of the tempered chocolate and put it in a small bowl (warm the bowl first) so it is close to the top.
- Use a special chocolate dipping fork – or a cocktail/crab fork.
Set up your space.
- If you’re right handed, put the ganache on the left, then chocolate for dipping, then a clean sheet pan. Reverse if you’re lefty.
- Drop a ganache ball into the chocolate, and bop it under gently with the fork, to flip it around.
- Pick it up, and dip it down onto the surface of the chocolate a few times (I’m OCD and do 4 times), the surface tension pulls extra chocolate off.
- Then bounce the fork on the edge of the bowl to get even more excess off. I do this 5 times
 Then carefully transfer your covered bon-bon to the clean parchment.
 - Wipe the bottom of the truffle on the edge of the bowl – or a wire (I made my own wiping gadget with a guitar string)
- To do this, make sure it is overhanging the edge of the utensil slightly, and set that edge on the parchment, and give a little push forward, before pulling the utensil out from under it. This helps stop “feet” from happening.
- If you want square chocolates, you can let your chocolate set in a rectangle, about quarter to half and inch thick, put a thin layer of tempered chocolate on top, and before it fully sets carefully cut (I use a cheese wire – that has never touched cheese), into rectangles. Dip it the same way, except use your fork to flip it over to make sure it is covered.
-
-
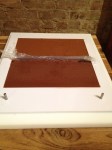
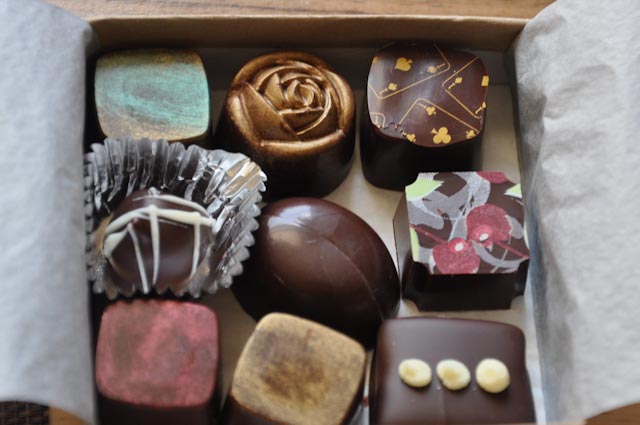
- Slabbed Chocolate – these get coated with tempered chocolate and cut into squares
-
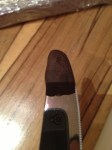
- Spotty tempered chocolate
-

- Nice shine
-
- Plastic bags = piping bag
-
If you have chocolate moulds:
- Fill the piping bag – using a slightly smaller round tip than you would for making round truffles… make sure the tip can fit in your mould.
- I typically get the moulds ready before making the filling, so I don’t have to keep the filling warm.
To coat the moulds:
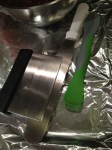
- Hold the mould over the tempered chocolate, and scoop chocolate into the mould, scraping it around with a clean metal board scraper. Make sure they are filled to the brim. Scrape off the excess so the top is level.
- Bang the mould on the counter to get air bubbles out (I cover the counter in tin foil). Do this for about 30 seconds.
- Set the mould on a sheet pan, and let sit for about two minutes (less time if the air is cold, longer if it’s warm). I usually fill another mould or two while waiting.
- Once it’s set, it’s time to dump the centers. Hold if over the bowl of tempered chocolate, hold it just past vertical – tap the mould with a board scraper or straight spatula (http://www.pastrychef.com/STRAIGHT-SPATULA_p_1177.html). Scrape off the excess. (You may need to turn up the temp. on the heating pad under the bowl, to rewarm the chocolate since you’re adding cooled chocolate back in)
- Set the mould upside-down on a sheet pan (or a rack over a sheet pan) Leave it there for a minute or two.
- Pick up the mould, and scrape off the excess chocolate.
- Set aside to allow to set fully.
- Don’t fill until the moulds are fully set.
- Fill the moulds, trying not to leave any air gaps inside. Fill to within 1 or 2 mm of the top. Tap down the tails that happen. Then level the tops out by scraping over the filled moulds with a board scraper – clean up any edges where you get ganache on the chocolate edge.
- Let the filling set for a while – usually 20 minutes is enough.
- To cap the moulds, hold them over the chocolate like you did before, and scoop chocolate onto the mould – usually 2 or 3 scoops, spread the chocolate around with a straight spatula. Tap it lightly on the counter, then scrape off the excess.
- Set the mould aside to set fully.
- Leave it overnight or for a few hours.
- To remove from the mould, get a clean sheet pan, lined with parchment. Flip the mould over (pick up any that fall out, and set them on another sheet pan). Slam the mould against the pan, lift up, and remove chocolates. Continue till all the chocolates come out.
- If some don’t, don’t scrape at them. Try popping them in the fridge for a while. If it still won’t come out, give up on it, and run it under hot water to clean out the mould. Don’t scrape your mould. Don’t use soap (unless you want soap flavored chocolate). Shake out the moulds to dry, or use a heat gun, to avoid water spots.
-
-

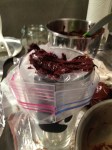
- Beet Ganache – these are slightly overfull actually
-
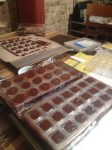
- Chocolates setting in molds.
-

Tips:
- If the chocolate is at the right temp. but starts to get goopey – you need to reheat some of it to above 112°F – to reduce crystals.
- Save the left over chocolate in a resealable container – you can reuse it a few times.
- Cover the counters
- Use a stiff spatula in the chocolate.
- Never stir ganache with a spatula – use a whisk.
- For extra smooth ganache – give a go in a food processor.
- If your ganache separates – let it cool down, then put it over a double boiler while slowly whisking in some liquor. Sometimes you can work in more fat (cream or butter) – but not if it separated because of excess fat, so you need to be able to tell the difference. Adding the cream too fast can lead to separation.
- Save left over ganache – freeze it. Use it in cake fillings, etc.
- The nifty patterns on cocoa butter on acetate transfer sheets, you can buy them only at pastrychef.com, or make your own with powder food color and tempered cocoa butter – or some nifty printer setups too.
- Heat the moulds to above 80°F with a heat gun.
- Heat the tops over the filled moulds before capping them with a heat gun.
- Use a heat gun to help cleanup.
*Chocolate crystals:
- There are 6 types of crystals (maybe more that haven’t been spotted)
- Alpha, gamma, beta” , beta’, and beta, plus type 6 (which I don’t think have a name).
- As you heat chocolate you melt all the crystals. When you cool it to ~85°F / 29 c you get all the crystals – which you don’t want. Only beta crystals are stable and snappy and shiny. So you slowly bring the temperature up to 90°F/32c – where all the unstable crystals dissolve and only beta is left.
Once you’ve covered things in chocolate or filled moulds and covered them – you have to make sure to set them in a place cooler than 80F with space between them for air flow – when you don’t do that you get the dreaded type 6 crystal – which is a grayish film that forms on chocolate that stays warm for too long. You can distinguish it from fat bloom because it looks streakier – less spotty – and it isn’t noticeable in the texture like fat bloom (which feels fuzzy) or sugar bloom (which feels gritty)
Sugar bloom happens when there is too much sugar in the chocolate so it crystallizes out – it also happens when excess humidity gets to the chocolate since sugar would rather dissolve in water, it dissolves and re-settles on the surface.
Fat bloom is similar – but results from too much cocoa butter to cocoa solids in the ratio. It happens a lot on white chocolate (since it doesn’t have cocoa solids and is an abomination/ decorative) – but you can’t see t because it just looks very white. White chocolate also oxidizes…nasty.

send chocolates
July 21, 2014
Thanks for sharing your thoughts about personalised chocolates uk.
Regards